In this tab, you will be able to view some of my work which is further detailed in the explanations along with the accompanying photos in each section. Note that they are in no particular order and will be updated with each new completed project. Please enjoy my presentation, thank you!
Tachi-Style Katana Restoration
In this piece, the original sword was a cheap and heavily damaged "Wall Hanger" or low-end sword. Handed to me by one of my best friends, he challenged me to restore his sword to "something nice", and so, the project began; unfortunately, I did not take photos of the pre-restored katana; trust me, it was not a pretty sight: the tsuka-ito was hanging in dirty white strands, the sageo was completely destroyed, and the saya was chipping and nearly damaged beyond repair.
````````````````````````

As you can see here in the image on the left, the sword not only looks restored and strong, but is. The white-turned aged yellow ito was replaced with a soft blue cotton cord, the samegawa (white rayskin beneath the wrap) was also replaced with two panels, for this piece, in my opinion, was not worth the price of a full samegawa tsuka (handle).
The ura (end knot) was thrust through the ring in the kashira (end cap or pommel) and forms a decorative tassel, there is a second tassel made of the same cotton material which matches the saya wrap.
The saya (sword sheath/casing) was sanded down to the bare wood and smoothed to receive a fresh coat of matte black paint an lacquer, the sword when placed in the saya was still not as appealing to me so I thought of what I could possibly use to further boost the look of this sword. The sageo on the original sword was very long and undamaged; a thick and patterned design struck me as too good to go to waste, so I wrapped the saya and the result surprised me more than I had thought.
I had placed no menuki (handle ornaments) on this piece, they instead went to the upper part of the saya where they look fitting and attractive secured by the lengthy blue cotton sageo cord.
```````````````````````

After a few hours and rigorous attention to detail, the sword was now fit for display in my friend's room. Surprised at how quickly I finished the sword, he was very impressed with the craftsmanship that went into it and now proudly shows it off to anyone who notices it. Also, as a special detail, I painted a small pink sakura (cherry blossom) on the collar on the top of the tsuka; you can see this on the first photo is the image quality is sharp enough to capture it.
Over all, I am happy with this sword and learned many techniques along the way; one important one being that a fully cord wrapped saya can be appealing on a sword as opposed to just a standard black lacquered wooden one. Also, a decorative tassel adds quite an elegant touch!
Over all, I am happy with this sword and learned many techniques along the way; one important one being that a fully cord wrapped saya can be appealing on a sword as opposed to just a standard black lacquered wooden one. Also, a decorative tassel adds quite an elegant touch!
The Sword of The Last Samurai: Reborn
"I belong to the Way of the Warrior of which the older ways have joined the new."

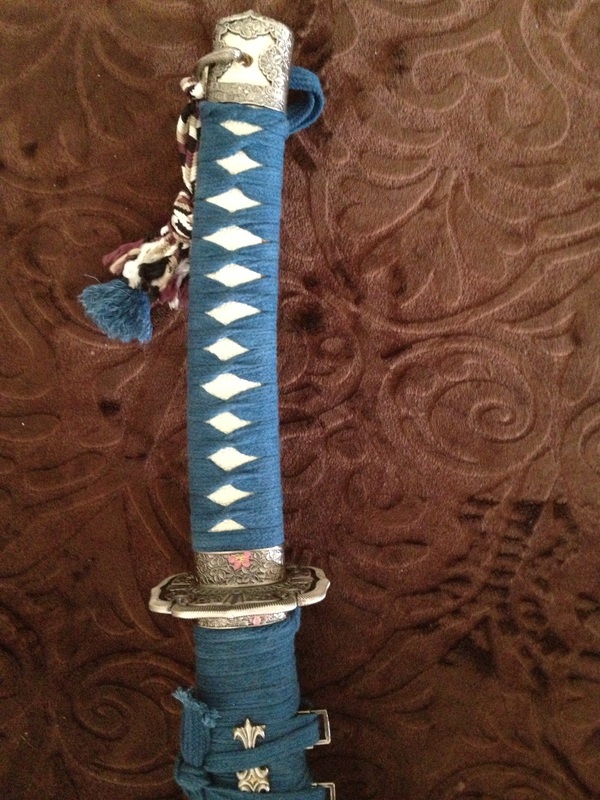
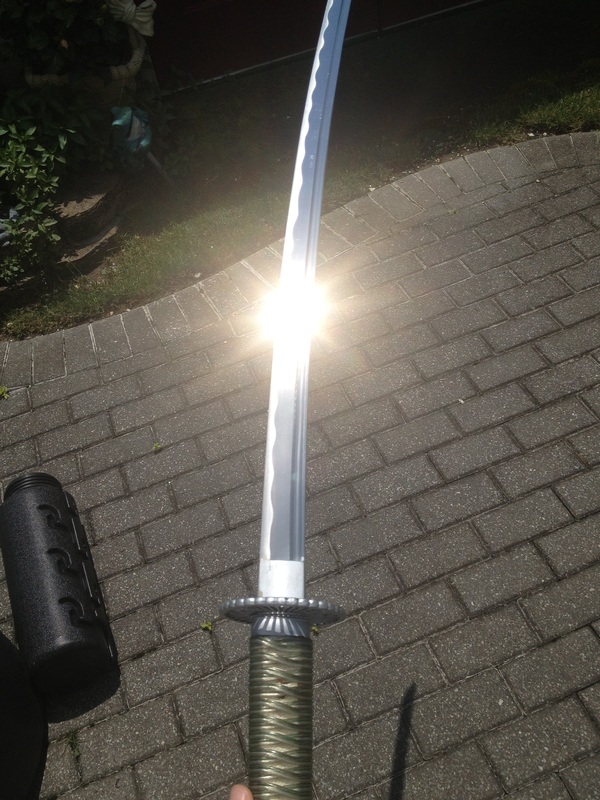
Being that this was my favorite film since the 7th grade, getting my hands on this sword was a really exciting moment for me. Starring Tom Cruise and Ken Watanabe, these two actors and the characters they portrayed became a huge part of my fantasies as I swung around my bokken in my backyard; images of the heat of battle ran through my mind as I lost myself within my training. The most outstanding feature, aside from the fact that its a replica of my favorite early teen film, is the engraved Kanji characters on the nagasa (blade). The engraving on this piece is very well done and artfully so, it runs deep in and its edges are crisp and clear; a long shot away from those awful low end swords where the characters are a shy away from being done in Sharpie pen.
Anyways, the sword arrived quite sharp and cut cleanly through water bottles and even a roll of wet paper towel. However, as the cutting persisted, the tsuka was not of the best quality wood and began to crack, therefore, within the code of Sword Safety 101: replace the tsuka to avoid a potential 30 inch razor blade projectile weapon. After a long search, I finally came across a fitting tsuka and purchased it; it arrived about a week later with two panels of rayskin. In the mood for a fresh style, I disassembled the original sword and housed it in its now tsuka with a newly drilled hole and mekugi (bamboo peg that holds the tang of the blade in the tsuka).
I also gave the sword silver fittings such as the iconic sun burst tsuba (hand guard) and the hibaki (collar around the blade). This sword is my main cutter so I replaced the tradional ito wrap with a style called "battle wrap" or Kate-maki; this is where the first few diamonds are made in a traditional wrap and the larger part of the tsuka is tightly wrapped with a coil-like pattern until finally finished off with the same traditional diamond pattern.
``````````````````

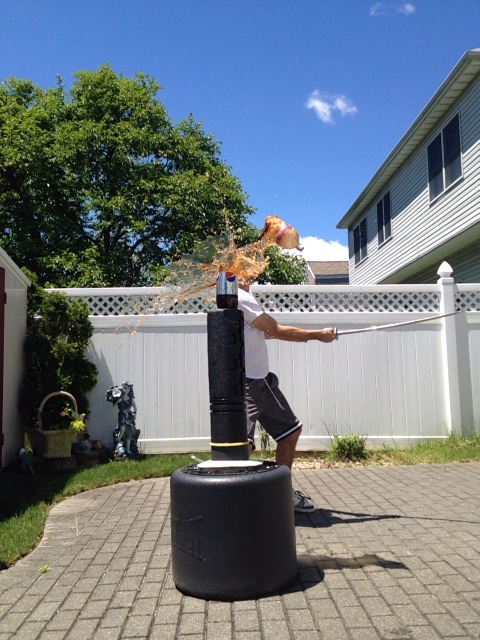
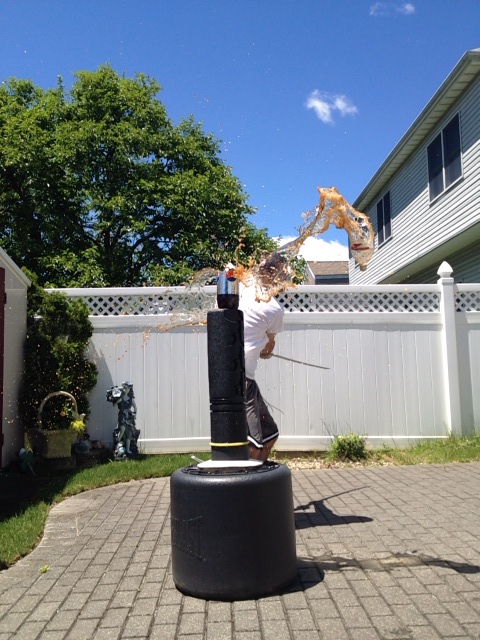
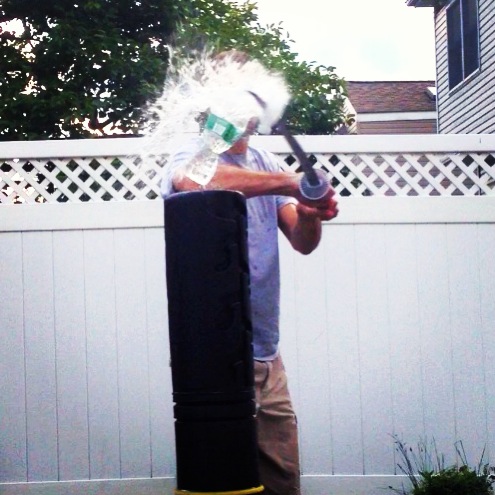
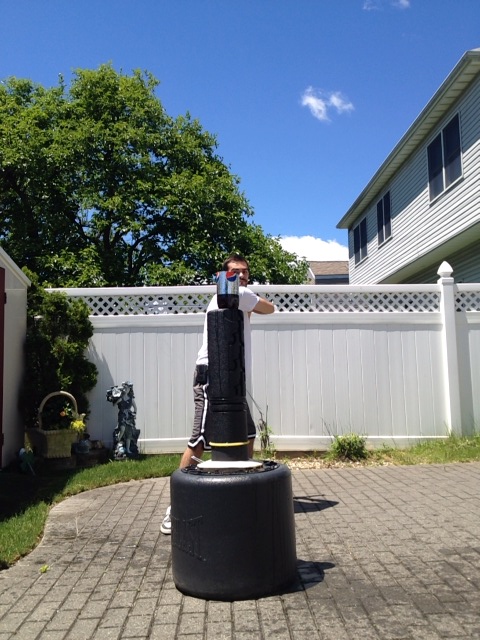
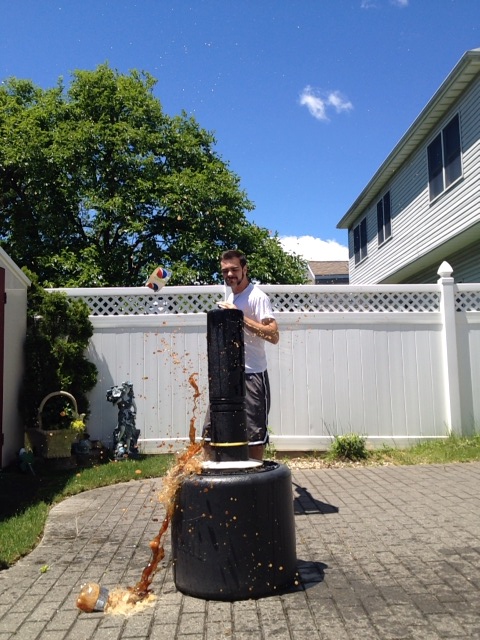
The sageo cord is the same cotton material I used to wrap the tsuka; a very attractive green that provides a great grip and aesthetic appeal. The saya, on the other hand, was kept in its original form: standard black and shiny lacquer but I got tired of it and decided to decorate it with a white marble panel, leaving only the top 1/4 in black. This design gives the sword an all-new look and feel, and in my opinion, a better one; the only downside being that this really is no longer an original movie replica. The sword still cuts very well and is now in need of re-sharpening since it has stood stable for over 100+ targets with only slight blemishes and scratches. The tsuka on this sword has remained undamaged and is still routinely checked regardless as are all of my other swords. I personally do not really notice a difference when it comes to grip when traditional wrap and Kate-maki; or battle wrap, are pit against one another; both are enjoyable to do and are appealing to the eye. This sword has also given me the opportunity to take really cool action shots; take a look!
Interestingly enough, I decided one day before I disassembled the original sword to try out an alternative wrap to cotton, silk, synthetic fiber, etc. And came up with a gorgeous emerald speaker wire cord complete with copper internals and it looked great! Unfortunately, the grip was quite slippery, rendering the sword a hybrid between display and a practice cutter; so I opted for the green cotton wrap as detailed above.
TENNO-HEIKA BANZAI!!
That's right, ladies and gentleman of the sword community, this is my personal creation of an Imperial Japanese Shin-Gunto (Military katana designed for high ranking officers). This sword style is without doubt the dearest and most beautiful design in my opinion. Those of you who are not familiar with this sword may have been wide-eyed at the era: World War II. Yes, the Japanese forces used the katana in battle up until this period; very effectively for that matter. The sword was designed for use after a wave of nationalism arose within the Imperial forces at the start of another World War; wanting to connect to their ancient routes, the military sword was designed in the style of a modern katana. Officers who carried this sword were easily identified as high ranking, thus caused little confusion within their ranks, however this came at a costly price: they were also easily identified by the enemy, thus making them an outstanding target for snipers and others alike.
I remember the first time laying eyes on this sword at a street fair when I was around 12 years old. It was laying on the hood of an old rusty US Jeep used in the Pacific theater; and as cool as that was, the Gunto had my fullest attention. The veteran told me the story of how he had recovered the sword from an Imperial Officer whom was killed in action and brought it home with him. The veteran also proceeded to remove the sword from its rusty saya via a locking mechanism located on the metal collar below the hand guard and held it between us. To my surprise, the blade was in great condition for its age; spots of rust, dirt, and perhaps even blood blotted around random sections of the blade. "Sharp" the old Vet stated as he shaved his thumbnail on the cutting edge of the razor sharp antique.
From that moment, I was captured in the essence of this sword and the stories they carry with them. You may ask: "were there actual accounts of people being killed with this? I mean, even during its time it was an antiquated weapon!" To answer your curiosity: Yes. Without doubt. In fact, many people were killed with this sword. In my research, I had found an Imperial Japanese officer by the name Noda, whom was recorded with a kill-streak of well over 100 Chinese soldiers during the Nanking campaign in 1938; and interestingly enough, he was a part of a contest with another fellow high ranking officer who served in the same regiment. The contest required the officers to kill as many of the enemy using only their sword, and so, they did. Noda exceeded over the limit of 100 while his competitor did the same, overall, the true number of people they killed is not known; and not really even talked about when it comes to WWII history; and I don't really blame anyone for that, I mean, to me, that is quite a gruesome thing.
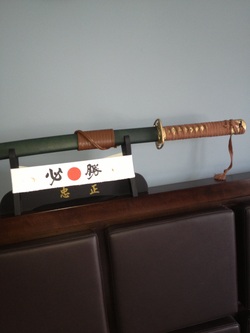
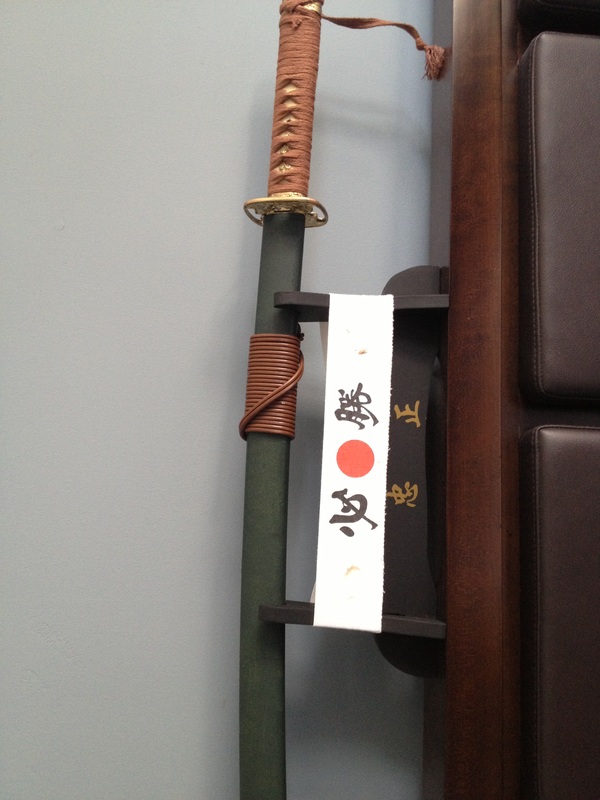
In my project, my goals were to replicate the color and overall feel of the sword; and to include a mechanism in which the sword could be worn, just like on the real officers uniform; all of which I succeeded in doing so. The original piece started off as a teal saya, blue ito and sageo wrap, and copper fittings; in my opinion, kinda tacky looking. So, first I painted the saya a dark military shade of green; about 2 or 3 coats did the job, and finished it off with an acrylic varnish that gave it a nice shine, just as an original one may have looked. The saya was also made of aluminum, this worked to may advantage as the originals were also made of the same material. I wrapped the saya with a thick brown rubber wire instead of a cotton sageo to use as the holster in which the sword would be worn on a belt, edge facing backwards, at the right side of the man.
The tsuba and fittings were gold plated and the style of which I wrapped the tsuka is a variant of kate-maki. The only features I was not able to include were the cherry blossom menuki and the locking mechanism; which unfortunately is the thing that drew me to this sword style in the first place. Regardless, the sword looks great to anyone I show to, and is complimented by those who know the details of the real Shin Gunto. It also looks great in reenactments and modern photographs that are made to look from the era.
I remember the first time laying eyes on this sword at a street fair when I was around 12 years old. It was laying on the hood of an old rusty US Jeep used in the Pacific theater; and as cool as that was, the Gunto had my fullest attention. The veteran told me the story of how he had recovered the sword from an Imperial Officer whom was killed in action and brought it home with him. The veteran also proceeded to remove the sword from its rusty saya via a locking mechanism located on the metal collar below the hand guard and held it between us. To my surprise, the blade was in great condition for its age; spots of rust, dirt, and perhaps even blood blotted around random sections of the blade. "Sharp" the old Vet stated as he shaved his thumbnail on the cutting edge of the razor sharp antique.
From that moment, I was captured in the essence of this sword and the stories they carry with them. You may ask: "were there actual accounts of people being killed with this? I mean, even during its time it was an antiquated weapon!" To answer your curiosity: Yes. Without doubt. In fact, many people were killed with this sword. In my research, I had found an Imperial Japanese officer by the name Noda, whom was recorded with a kill-streak of well over 100 Chinese soldiers during the Nanking campaign in 1938; and interestingly enough, he was a part of a contest with another fellow high ranking officer who served in the same regiment. The contest required the officers to kill as many of the enemy using only their sword, and so, they did. Noda exceeded over the limit of 100 while his competitor did the same, overall, the true number of people they killed is not known; and not really even talked about when it comes to WWII history; and I don't really blame anyone for that, I mean, to me, that is quite a gruesome thing.
In my project, my goals were to replicate the color and overall feel of the sword; and to include a mechanism in which the sword could be worn, just like on the real officers uniform; all of which I succeeded in doing so. The original piece started off as a teal saya, blue ito and sageo wrap, and copper fittings; in my opinion, kinda tacky looking. So, first I painted the saya a dark military shade of green; about 2 or 3 coats did the job, and finished it off with an acrylic varnish that gave it a nice shine, just as an original one may have looked. The saya was also made of aluminum, this worked to may advantage as the originals were also made of the same material. I wrapped the saya with a thick brown rubber wire instead of a cotton sageo to use as the holster in which the sword would be worn on a belt, edge facing backwards, at the right side of the man.
The tsuba and fittings were gold plated and the style of which I wrapped the tsuka is a variant of kate-maki. The only features I was not able to include were the cherry blossom menuki and the locking mechanism; which unfortunately is the thing that drew me to this sword style in the first place. Regardless, the sword looks great to anyone I show to, and is complimented by those who know the details of the real Shin Gunto. It also looks great in reenactments and modern photographs that are made to look from the era.
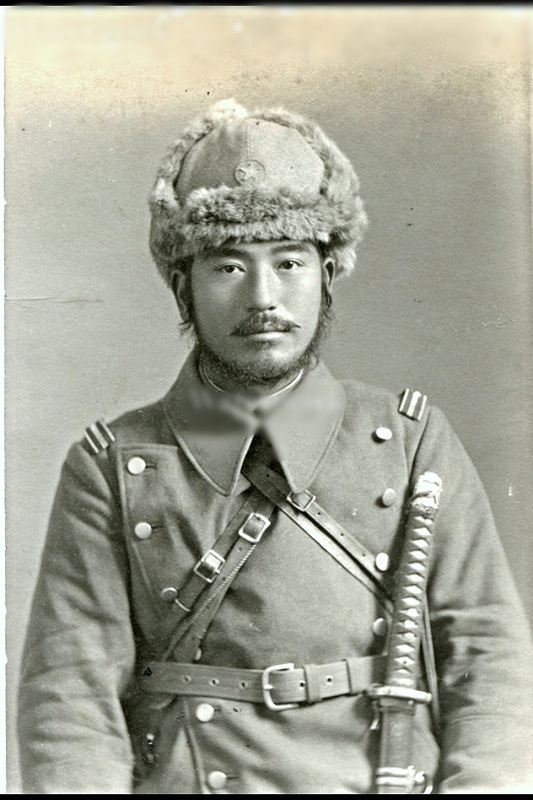
Kamikaze Pilot shown with Shin Gunto. Photo taken in 1943
A Set Fit for the Shogun Himself!
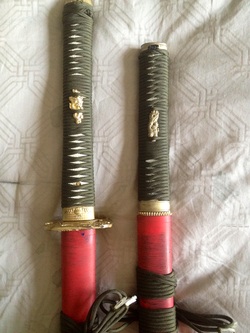
In this project, I decided to create a pair of swords with two goals in mind: an eye-popping color scheme, and kate-make style wrap. This pair of swords came out great! At first I was weary as I sanded down the saya of the katana and wakizashi (shorter sword) thinking that the red paint I chose wouldn't look all that great with a green and gold color scheme; had this been executed poorly, it would have been fitting for a clown as opposed to a Shogun!
Anyways, the painting went well for the saya, a standard 2-3 coats for each saya and an acrylic varnish to finish; they came out stunning and dry to the touch; this minimalized fingerprints, and in my opinion, is something I really cannot bare to see on any part of the sword. The tsuba and fittings were painted gold along with the golden dragon menuki. Originally, the katana was the Blue Standard of the ITO Company; the one with the gold streaks on the saya, and the wakizashi was of the Musashi company and was marketed with the famous two-ring tsuba, which was removed from this project and had instead been replaced by 4 seppa (thin alloy collars between the hand guard) for a sleeker appeal.
The tsuka was wrapped in kate-maki style with something less traditional yet more practical: paracord. I found this very beautiful and the link that really sparked the match on this set. Although quite thick and some getting used to, it works overall and is up to par with any traditional materials used. The sageo is wrapped in my custom technique; which I may outline given the proper medium to outline how step by step, in a thick and practical; and artful fashion. This set looks great on my desk and was well worth the labor and hours of work!
Hand Painted Tsuba

This tsuba, or sword guard originally came as a dark alloy piece on one of my most favorite katana. Having disassembled the sword, I started to notice the fine engravings and details within the item and out of boredom, decided to paint it. I used acrylic paint markers and to my surprise, it stayed on strong and resisted scratches and weathering after a few coats of shiny lacquer. This piece depicts a flowing river and a cherry blossom branch, I was happy to bring this design to life through the use of vibrant colors. The small silver object in the river is of a small fox that is being hunted by warriors on the reverse side of the tsuba.
Reverse Side

The reverse side as depicted shows two warriors, one mounted on his steed and the other walking through the river, spear in hand, looking for the fox. The cherry blossom branches and petals flow gracefully in the background during the midst of this hunt. I feel this piece is simple yet elegant, and painted tsuba are very fun to paint, and when executed well, can produced a unique and custom scenery for your sword.
Hand Painted Square Tsuba

This tsuba, belonging to the ITO Blue Model sword, depicts two warriors charging towards one another, yari (spear) in contact with each other. This was my first attempt at painting tsuba, and although this piece is a bit rough, I thought it came out well anyways, and added to my learning of how to properly go about these miniature projects.
LEGENDARY TALES OF THE EAST AND WEST....AS ONE!

This sword, without doubt, was my favorite project to do. In this set, the katana is marketed as The Arrow Katana which I believe is Ten Ryu, and acts as the longsword in this traditional set of three: the katana, the wakizashi, and the tanto. The katana is wrapped with green paracord (it was removed of the thin white innard threads) and provides a sleek, firm, and elegant grip for the weapon, and is detailed with gold and silver striped menuki under the ito. The saya is a black matte finish and acrylic varnish to protect from scratching and weathering, the tsuba is the hand painted fox hunt piece as pictured above.
````````````````````

The paracord wrap was very thin, and created these elegant diamonds along with a flowing wave pattern. Overall, I love the look of this. It is traditionally wrapped with no folds; just one end of ito above the other, as shown in Tachi-style swords.
The East

The sageo cord on the saya for this piece is very thick for it was used to secure the leather sheath for the consecutive blade. I feel it looks beautiful as a single sword but felt it necessary for this project to go above and beyond.
The West

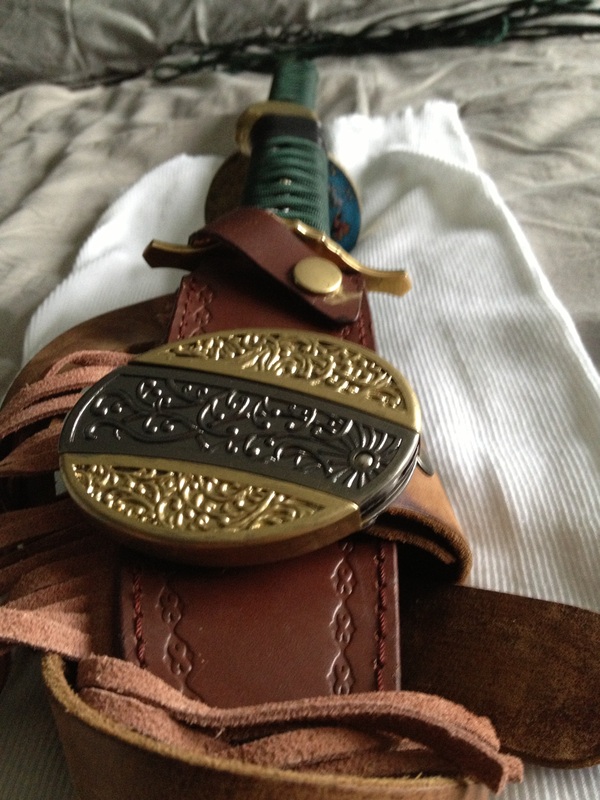
The Western part of this piece, acting as the wakizashi, or short sword, is a retired United Cultery Bowie. The hilt of the knife was originally a full tang black handled piece that looked more alike to a kitchen knife. With that in mind, I wanted to put a twist on this piece, so I wrapped the thin cords within the paracord around the hilt to simulate a rayskin handle; technically this was Jabara-maki, where a thin cord was wrapped around the tsuka; this was mostly seen on tanto and other small blade hilts. I then wrapped the same color-green paracord around that and formed a matching hilt for the piece; the colors were vibrant and beautiful in contast to the brown leather sheath.
My inspiration came from the green color of the Praying Mantis Katana produced by Cold Steel, as well as the cunning intellect of the real insect and the myth and lore surrounding it in Eastern philosophy. When it came to the West, I was researching in school about The Battle of the Alamo at the time and came across a historical character by the name of Jim Bowie, who was a popular figure in the era when it came to his legendary fighting skills with his trusty bowie knife. I loved both lore of each cultures so decided to combine them, this was a feeling that I believe Quentin Tarantino got as he directed both Kill Bill Volumes: the blending of two great philosophies in one item.
The sword and bowie are tied together by the paracord sageo and is a piece fitting for battle and also- elegant display. The tanto is secured within the belt buckle, it is a tiny inch blade that is totally unnoticeable where it is stored; you can see tell it apart from the rest of the buckle as the silver strip in between the two gold pieces. Note the color of the buckle is the same as the menuki under the ito; this is a very detailed piece.
Note: the tanto in the belt buckle
Three Beautiful Katana on Display
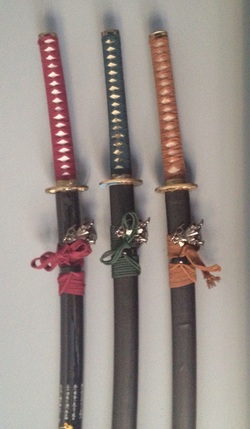
These katana have been assembled, wrapped, and painted by me. Each one took a few hours to complete and look great on display. The objects holding the three katana in place are Denix sword holders, and they work great. I love them because they are artistically made and in my opinion, display pieces all on their own. Simple to install, they are held in place by two screws and remain secure. I have not tested the amount of weight they can hold, but they are designed for swords and excel at just that; had I were to take an educated guess; 10lbs would sound about the maximum limit.
A Most Elegant Machete

When I saw the Bushmaster Cutlass by Condor, I was immediately interested because this was the first well-made hybrid of a sword and utility tool for a reasonable price of about $30. I was not disappointed. This hybrid blade cut through water bottles and thick grass with ease, it also shredded soda cans. The blade has the right amount of flex to absorb impact and retain its shape. Originally this product came all black aside from the sharpened edge- this was left chrome; however, the blade had a strange thin coating, I assume this was to protect the black paint from chipping. Anyways, I wanted this piece to look a little more handsome because I am not a fan of sloppy or rugged swords (even if they are durable and only aesthetically made to look that way). I painted the guard and lion motif gold and covered the hilt in panels of brown leather, then silver wire was used to secure the piece together; in fact the hilt was stronger than it was on the original product.
I am happier now this piece looks more presentable as opposed to an all-black ugly tool looking thing. I also sanded off the black paint on the blade so it is now silver and reflects more of an elegant nature as opposed to a workman's tool. I also painted and lacquered the leather sheath from black to brown; the sword now looks like a British Empire cutlass circa 1700's with a very decorative hilt.
I am happier now this piece looks more presentable as opposed to an all-black ugly tool looking thing. I also sanded off the black paint on the blade so it is now silver and reflects more of an elegant nature as opposed to a workman's tool. I also painted and lacquered the leather sheath from black to brown; the sword now looks like a British Empire cutlass circa 1700's with a very decorative hilt.
Chinese Jian
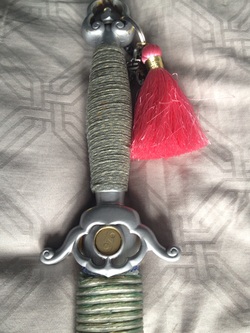
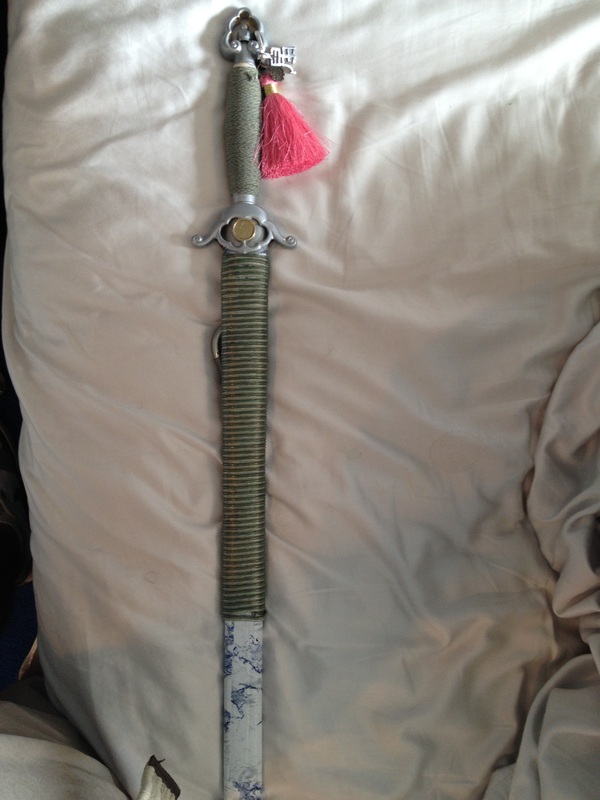
This sword started out as my practice saber for tai chi and yoga forms. Originally, this piece was all white with gold fittings; and really quite shoddy and poor looking. The seller of the product was BudK. Seeing that it could be improved, I set upon doing so, and having only experienced work in the Japanese sword, I thought a completely different style, sword, and all around culture would be exciting to dive into.
```````````````````````

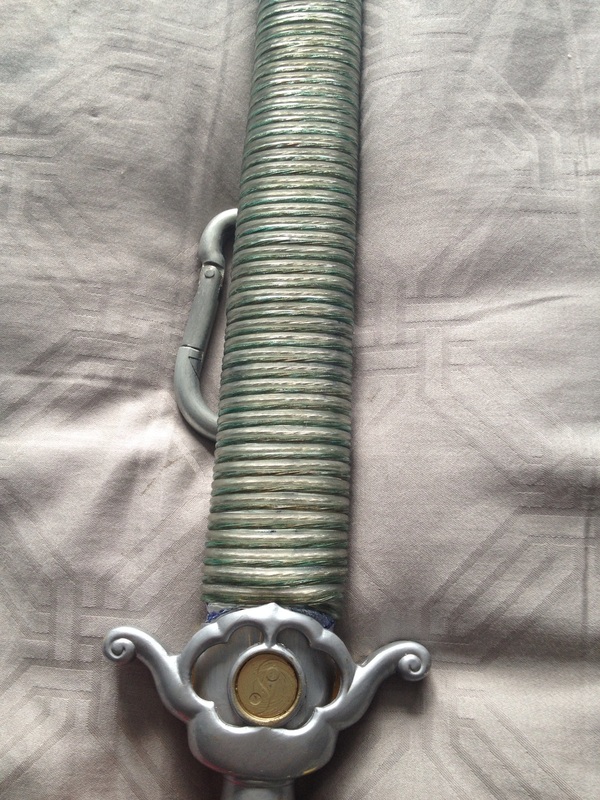
Starting with the sheath, I wrapped the top half with an emerald green speaker cable and incorporated a belt clip for easy wear. the emerald wire was originally the tsuka ito of the Last Samurai katana for quite sometime but I felt it needed a new home rather than going to waste. This wrap makes the sheath scratch resistant, improves durability in different elements, and adds an overall feel of elegance to its design compared to the original sword.
`````````````````````````
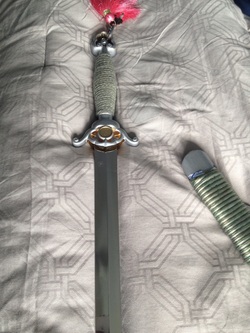
The combination of emerald and silver give the sword an overall new look, also since it is customized, you won't be able to find a similar looking product. The colors give off an aura of a calm, tranquil, and coldness that really adds to the highlight of the pink tassel.
The Sword of ZATOICHI: The Blind Warrior

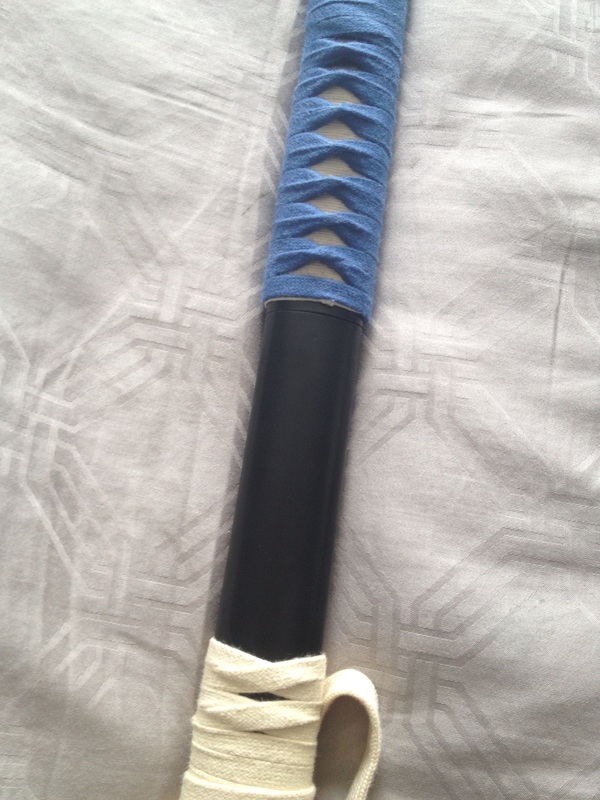
Here is one of my projects that was more of an experiment to see "what if" as opposed to something I'd consider part of my skill set. What I wanted to discover is whether a shirisaya (a temporary wood housing for a blade before it was fitted for use) can be converted into a sword as a whole; wrapping and sageo specifically, and look good while doing so; and also safe for practice.
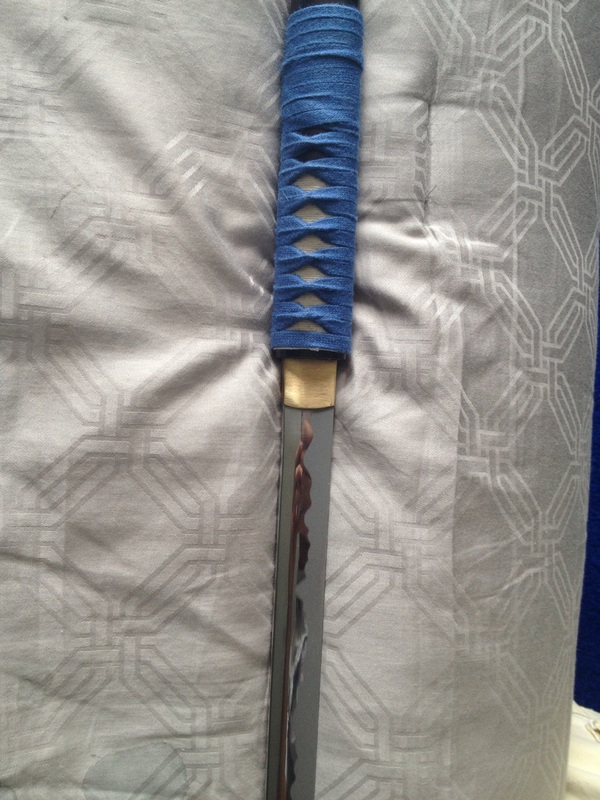
This blade is made by CAS Hanwei and is one of the most gorgeous blades in my collection; mostly because I think the Ha (wave pattern) on the cutting edge has a personality of its own.
I started by wrapping the handle with a thin white cotton cord to simulate the rayskin. Then, with a thick blue cotton cord, I overlapped the white "rayskin" and formed a traditional diamond pattern (heneri-maki), however, the wrapping got hard to control so I opted to coil the remaining cord around. Overall, the wrap was tight and the sword is easier to grip as opposed to a smooth wooden shaft; which is dangerous for sweat and human oils can both damage and cause the blade to fly out of hand.
Anyways, I think I will end up removing all of the wrap and just keep this piece as it came, for that's really why I loved it: simple, with a hidden surprise.
THE SUPER MARIO KATANA

This project was sort of done on a whim. After taking a trip to my local department store, I noticed this Super Mario duct tape; which is actually quite expensive now since it is considered a retired product, and thought to myself how cool would it be if I paid a homage to one of my favorite childhood games through a sword? I suggested it to my friend and he was quite surprised by the idea. So I went for it.
First I purchased a low-end katana for this project since I meant this more as a display piece/experiment and would upgrade to a better sword given the outcome of the piece. Next, I purchased red leather ito, which is very thin but feels great to the touch, and it is very bright just like the vibrant colors of the Super Mario character; it is the same color- pure red. And lastly, the duct tape.
First I purchased a low-end katana for this project since I meant this more as a display piece/experiment and would upgrade to a better sword given the outcome of the piece. Next, I purchased red leather ito, which is very thin but feels great to the touch, and it is very bright just like the vibrant colors of the Super Mario character; it is the same color- pure red. And lastly, the duct tape.
`````````````````````

The process of wrapping the hilt of this particular sword was very difficult given that the leather cord was very thin. I managed however because the final outcome was just too exciting to put on hold despite the aching in my joints. Next came the saya which was its own challenge because of the curve, there was no room for error as the tape was very adhesive and could ruin the project had I slipped up. The saya was done with two long strips of the decorative tape and is going to be finished with a shiny lacquer to keep it from peeling off. A small sageo of the same red leather was tied to complete the project for now. I plan on upgrading the sword and repeating this design even greater, as well as accenting a Star character as the tsuba. Also, I will be making a second sword to mimic Luigi, the grother of Mario; that particular sword will contrast the red in this sword with a bright green.

